Tile Lacquer 897
Simply paint tiles – no primer needed!
- Solvent-free paint – pleasant to work with
- New feel-good atmosphere in two hours
- No noise and no mess
- Extremely durable
- 3 in 1: primer, top coat and sealant in a single step
Replacing tiles is labour-intensive, causes dirt and noise and often requires the services of a professional tradesman. The easier and more affordable alternative? Paint your own tiles with JAEGER tile varnish: After coating, which is simply brushed on, the tiles look like new and a new ‘feel-good atmosphere’ is created in the bathroom or kitchen – for years to come!
For coating and renovating ceramic wall and floor tiles. The varnish is solvent-free and consists of two components that bond with each other to form a high-gloss, durable varnish film. Thanks to its high covering capacity, one coat is sufficient for a tile with an even surface. Only in the case of a tile with a dark colour as the substrate may a second coat of paint (another set) be required to cover it. The varnish is designed for a tiled area with a surface of 6.8 m².


For technical reasons, the colours on the monitor/display are not binding. Please refer to the colour chart for binding colours.
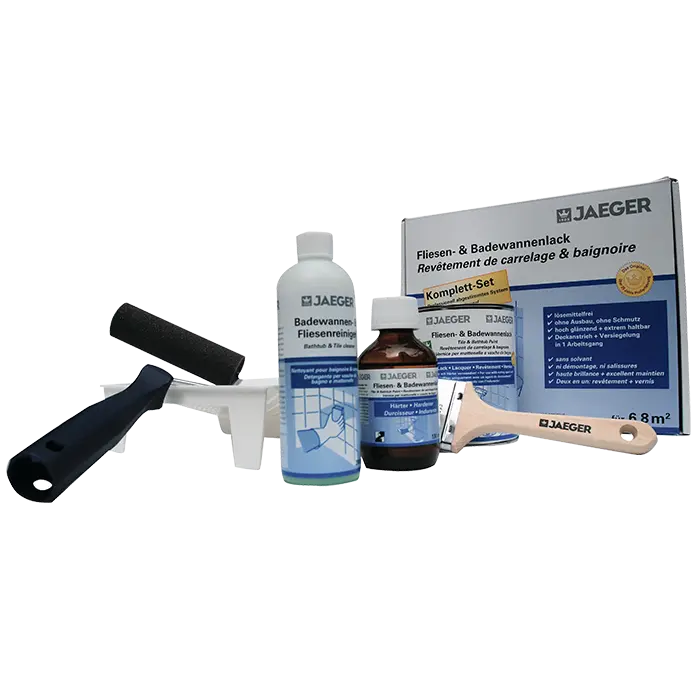
The professional set consists of:
- 2-component varnish
- paint brush
- short pile roller
- paint tray
- descaler
- cleaner
- dust cloth
- four sheets of sandpaper in two grits
- processing instructions

Painting tiles with tile varnish – step-by-step instructions for a thorough coat
1. Preparation
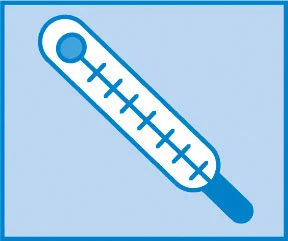
1.1 Maintain temperature
As a first step in the instructions for painting tiles on walls or floors in the bathroom, kitchen or another room, store the paint components at a temperature of approx. +22°C for at least 24 hours before processing, so that the paint can be applied smoothly. For the best possible painting result and colour shade, the room temperature and the temperature of the tub must be between +22°C and +25°C during application and throughout the entire curing time of five days, so that the tile paint can dry thoroughly at the end. A relative humidity of 50% is optimal, which is most easily achieved by heating.
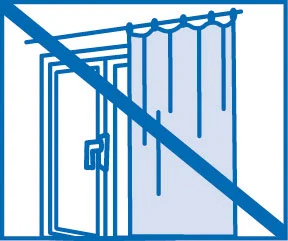
1.2 Remove sources of dust
Remove all sources of dust, such as towels, curtains, etc., before painting tiles in kitchens or bathrooms and wear lint-free clothing during application. Avoid creating dust due to drafts.
1.3 Masking
Surfaces that are not to be coated before tiling should be masked. Old silicone joints are either also masked or removed and re-grouted later.

Attention: silicone
Silicone acts as a separating agent, varnish cannot adhere to it. If the silicone joint is removed, silicone fragments must not contaminate the surface to be coated. It is therefore best to line the entire surface of the tub with film and to tape the edges of the film close (approx. 2 cm) to the silicone edge. Then use a sharp knife to cut out the silicone in the joints completely. After that, sand the joint area thoroughly and clean it with a cloth soaked in silicone remover or white spirits. Change the cloth several times.

2. cleaning and descaling
2.1 Descaling
Remove limescale from tiles and grout, especially when tiling in the bathroom, with the descaling agent (citric acid granules) included in the set. To do this, dissolve the contents of the descaling sachet in 2 litres of water. Caution: Avoid contact with skin and eyes. In case of contact with eyes, rinse immediately with water. Wet the tiled surfaces several times with the descaling solution so that it is left to work for about 10 minutes. Then rinse with clean water.
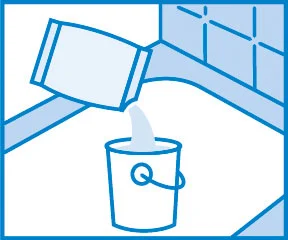
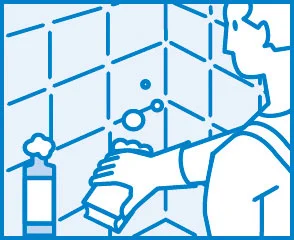
2.2 Cleaning tiles
To clean the tiles, mix JAEGER bath and tile cleaner with approx. 1 litre (2 litres: set 6.8 m²) of water and use a sponge or brush to clean the surfaces. Caution: Protect eyes and skin from contact. Household gloves are recommended for cleaning the tiles. In case of contact with eyes, rinse immediately with water. Then rinse with clean water. Allow to dry and reduce increased humidity by ventilation. Observe temperature (+22°C to +25°C) for drying!
2.3 Touching up
Thoroughly touch up any damaged areas on tiles or tile joints with polyester or epoxy resin filler before painting and sand down wet with fine sandpaper (P320) after hardening. Rinse off sanding residue and allow to dry. Allow to dry. Note temperature! Hairline cracks in the joints must be repaired with acrylic grout.
2.4 Dusting tiles
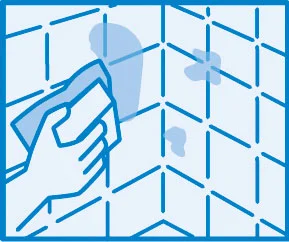
To thoroughly remove any remaining dust particles before applying the tile paint, wipe the dried surface with the dusting cloth.
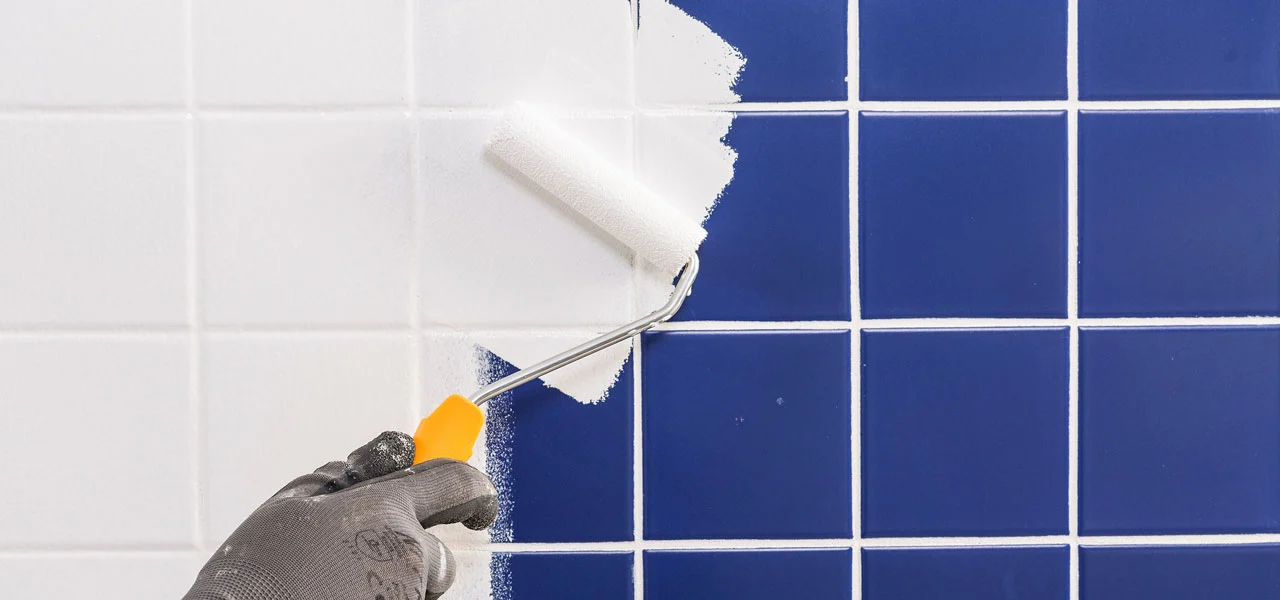
3. painting tiles
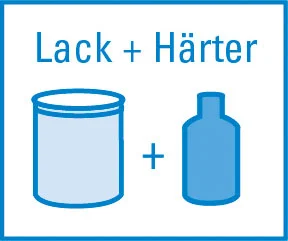
Pour the entire contents of the hardener bottle into the paint tin, stir the mixture intensively for at least 2 minutes using the stir stick and pour into the paint tray. Stir briefly again and paint the tiles – apply the tile paint thoroughly, layer by layer. Avoid contact with skin and eyes when painting tiles! The mixed material is easy to spread for about 50 minutes.
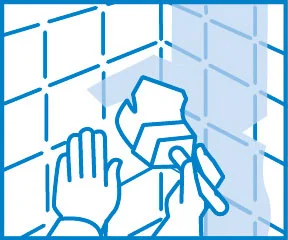
Pre-coat tile joints and hard-to-reach areas such as corners, curves and edges using a brush.
Pre-coat and prime areas repaired with filler in a targeted manner.
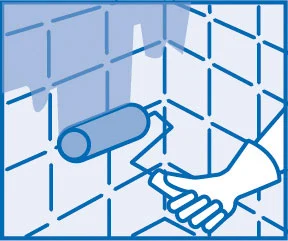
Once the joints have been thoroughly pre-coated, place the paint roller on the roller handle only so far that the roller cannot streak. Then apply a thin coat of varnish with the roller and distribute it evenly in both longitudinal and transverse directions.
Do not apply the tile paint too thickly, to avoid runs, drips and too much tile paint in the joints.
Finally, roll the surface or substrate with the roller in one direction to achieve a surface that is as even as possible.
Estimated working time: approx. 25 min.
4. Reworking
The coating is dust-resistant approximately 5 hours after application. Avoid drafts and dust generation for this long. After about 8-24 hours, the adhesive tapes can be removed and the silicone joints can be regrouted.

For the following five days, keep the room temperature in the bathroom, kitchen or other room at a constant +22°C and avoid exposure to water so that the tile varnish can dry thoroughly. After that, the tiled surfaces can be used normally again.
When first using the area after painting, start with lukewarm water after using hot water and then slowly increase the water temperature to avoid stress cracks.

Versatile tile varnishes for every application
In addition to the classic tile varnish, there is also a water-based tile varnish in the Jaeger bathroom renovation system. For floor tiles that are subject to heavy wear, there is also the Kronalux® 2K PU tile floor coating. JAEGER has the right solution for every renovation, whether it involves wall or floor tiles.
product data
spreading rate
| paint/roll | spraying |
|---|---|
| 6,8 m²/Set |
item number/shade
| item number | shade |
|---|---|
| 897-0020 | Alpinweiss |
| 897-0800 | Reinweiss |
size of trading unit/box content
| size of trading unit | box content |
|---|---|
| Set | 1 |